Pages

Sunday, December 25, 2016

Salesforce: Tips on Cross-Object Formulas


Cross-object formulas are formulas that span two related objects and reference merge fields on those objects. Cross-object formulas can reference merge fields from a master (“parent”) object if an object is on the detail side of a master-detail relationship. Cross-object formulas also work with lookup relationships.

To create a cross-object formula when building a formula, enter the relationship names of the objects to which you are spanning followed by the field you want to reference. Separate the relationship names of each object and the field with periods.

For example, enter Contact.Account.Name to reference the Account Name for a contact associated with a case in a formula field on the Case object. Be sure to use the relationship names of the objects, not the labels. Although the relationship name is often the same as the object name, it is technically the field name of the relationship field.

To reference the parent account name from Account object, the syntax is Parent.Name, not Account.Name. When referencing a custom object, add two underscores and the letter r to its name. For example, Position__r.title__c references the Job Title field (title__c) on a Position custom object.

You can reference fields from objects that are up to 10 relationships away. Cross-object formulas are available anywhere formulas are used except when creating default values.

If you create a formula that references a field on another object, users can see the field on the object even if they don’t have access to that object record. For example, if you create a formula field on the Case object that references an account field, users can see this field even if they don’t have access to the account record.

Tips
Formula fields can expose data that user do not have access, such as:
- user do not have access to the field level security within the same object
- cross-object where user do not have access to the record
- cross-object where user do not have access to the record and the field
- cross-object where user do not have permission to the object


Roll-Up Summary Field
If a roll-up summary field doesn’t contain cross-object field references or functions that derive values on the fly, such as NOW or TODAY, it can calculate the values of formula fields.


Reference:


Saturday, December 24, 2016

Logs Inspector for Salesforce Admin

What is Logs Inspector?  
Logs Inspector maybe famous for Salesforce developers, but not for admin. So what is Logs Inspector?  It is a context-sensitive execution viewer that shows the source of an operation, what triggered the operation, and what occurred afterward. Use this tool to inspect debug logs that include database events, Apex processing, workflow, and validation logic.

Where is this tool located? 
Logs Inspector is located under Developer Console. Only user with “View All Data” permissions have access to Developer Console, for complete permissions needed, see this document View Debug Logs.

If you aware of Debug Logs (navigate to Setup | Logs | Debug Logs), Logs Inspector will show the same log, but with more info.

Once you are in Developer Console, click Logs tab at bottom left.


The same with using Debug Logs, when you do a transaction in Salesforce, the logs will be captured here. If you go to Debug Logs after transaction, you will notice your name is auto added / renewed in the User Trace Flags with current date time.


What can Salesforce admin make the most of this tool? See screenshot below, pretty complex isn't it.


There are many panels here, you can switch on/off from Debug menu | View Log Panels... or use Perspective Manager to save and load preferred panels. There are six panels in total:
1. Stack Tree
2. Execution Stack
3. Execution Log
4. Source
5. Variables
6. Execution Overview

I am not going to explain each panel in this blog, or maybe as admin you are not so interested to know all, except Execution Log which is captured all logs and similar with debug logs, where you can find logs related to things that you are looking for, like field update, soql, etc.

I am personally interested with Execution Overview, there are four tabs in this panel, but as admin, I am most interested with Save Order and Timeline tab.

The Save Order tab displays a color-coded timeline of DML actions. For each DML action taken, save order elements are shown as boxcars in the timelinem click the box too see more details.


The box color are used to differentiate between elements:
  • Red = before trigger
  • Orange = after trigger
  • Green = Validation rule
  • Blue = Assignment rule
  • Purple = Workflow rule

From above screenshot, we can trace the order of execution when create a new Account. Let's analyze:
Apex Trigger
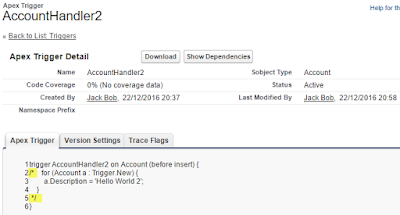
Execution start with "before" trigger. Because there are 2 active triggers, Salesforce will randomly fire a trigger, continue with the other trigger. There's why it is not recommended to have 2 active triggers in an object.
Trigger: AccountHandler2 execute "before insert"
Trigger: AccountHandler1 execute "before insert, before update"

Validation  
Next, it will execute validation rules exist for that object.

Workflow
In this workflow there is a field update to a field in Account.

Apex Trigger
Because of workflow above, it will trigger AccountHandler1 again because this trigger execute "before update"


The Timeline tab provides a visual representation of the time taken by each process. Select the Scale option that results in the most useful view.


From timeline bar above, we see Validation rules take longest time for this sample of DML action to an account.


Reference:


Thursday, December 22, 2016

Salesforce: delete Trigger and Apex Class in Production

In previous blog deactivate Trigger in Production, we share how to deactivate trigger in Production environment, also option to comment whole trigger or apex class. Comment the whole apex class or trigger should not cause any issue, but that's not ideal, personally I prefer just to delete it.

But, as in the blog earlier, there is no Delete button in Trigger and Apex class. So how to delete it? In this blog, I'll use Workbench to help, you can do the same using Ant migration tool.

In short, you need the same procedure as with deploying components, but also to include a delete manifest file that’s named destructiveChanges.xml and list the components to delete in this manifest. The format of this manifest is the same as package.xml except that wildcards aren’t supported.

1. Prepare the files
package.xml - you can copy and file from below:
<?xml version="1.0" encoding="UTF-8"?>
<Package xmlns="http://soap.sforce.com/2006/04/metadata">
    <version>38.0</version>
</Package>

destructiveChanges.xml - make sure 'C' in capital
sample file:
<?xml version="1.0" encoding="utf-8"?>
<Package xmlns="http://soap.sforce.com/2006/04/metadata">
  <types>        
    <members>Class1</members>
    <members>Class2</members>
    <name>ApexClass</name>
  </types>
  <types>
    <members>Trigger1</members>
    <name>ApexTrigger</name>
  </types> 
<version>38.0</version>
</Package>

Put both files above in a folder, zip the files (without folder) and name it as package.zip. For the name tag in the file above, see Metadata Types.


2. Workbench
Login to Workbench, select Migration | Deploy, select the zip file and enable both 'Rollback On Error' and 'Single Package'.


Click Next button button to continue, then Deploy button to proceed.


Wait for deployment, normally will take less than 1 minute. Once finish, you will get the result -- done and check the status.


Reference:


Salesforce: deactivate Trigger in Production

In certain circumstances, we need to deactivate trigger temporary or permanently. But, if you open the trigger in Salesforce production environment, you will not see Edit and Delete button.

screenshot from production org.

screenshot from sandbox org.

So, how to deactivate trigger in production? In short, deactivate the same trigger in sandbox and deploy it to production. You can deploy with Ant, Force.com IDE, or simple Change Set.

after inactive trigger deployed to production


The other option is to keep the trigger active, but comment all the content. Although this is not ideal, but you can use the same concept to remove any logic in Apex Class.


Reference


Wednesday, December 21, 2016

Salesforce: Skills

This blog is not about general Salesforce skills, but there is a feature in Salesforce called Skill, many of us maybe never heard about, although it has been available for quite sometimes (since Summer '14 release).

First of all, as Salesforce admin, you need to enable this feature. Navigate to Setup | Customize | Work.com | Work.com Settings

Then, you also can enable more setting:
- Edit Skills and Endorsements via record detail pages
- Enable Suggested Skills
But, you are not always need to enable this additional features.


Once enabled, you will see a new related list under User detail, called User Skills. From here, you can add New Skill or New Skill User.

New Skill
- this mean to create a new Skill with Description
- record prefix 0Sk
- object API name: ProfileSkill

New Skill User
- this mean to assign user with existing Skill
- record prefix 0SM
- object API name: ProfileSkillUser

Another related object is Endorsement
- this is represents a detail relationship of ProfileSkillUser.
- record prefix 0SE
- object API name: ProfileSkillEndorsement

On top of new related list under User detail called "User Skills", you will also notice Skill and Skill User added in the Profile: Page Layout, Field-Level Security, Tab Setting (for Skill only), Record Type Settings, and Object Permissions (Skills, Skill Users, and Endorsements). Make sure your users have the object permissions enabled to be able to view, add Skill and endorse other user.

Once Skill is enabled, user can go to their User Detail to add "New User Skill", or admin can add Skill for their users too. Once added, Skill it appear User Overview tab too.


User with Endorsement object permissions enabled will be able to endorse Skill of other users.


The same info can be seen from User detail related list too


Reference:


Thursday, December 15, 2016

Salesforce: Trigger Best Practices

I have see in many org, where developer / consultant implement Salesforce with customization that not following best practice. It may work for a while, but on going support become challenge.

In previous blog, we share basic of  trigger related to syntax. In that blog, it show we directly add logic in the trigger itself, but is that a best practice? For sure it is not, why? There are many reason, from: test purpose, re-use and etc. So, here is the sample copy from previous blog:

trigger AccountHandler on Account (before insert) {
    for (Account a : Trigger.New) {
        a.Description = 'Hello World';
    }   
}

The best practice is to have less logic within trigger itself, and put the logic in the apex class, so trigger more act as traffic light to arrange to call the right class.

We can easily modify above trigger to split the logic into apex class:

Trigger
trigger AccountTrigger on Account (before update) 
{
    AccountHandler objAccount = new AccountHandler();
    objAccount.onBeforeUpdate(Trigger.newMap);
}

Apex Class
public class AccountHandler
{
    public void onBeforeUpdate(Map<Id,Account> mpAccount)
    {        
        for (Account a : mpAccount.values()) {
            a.Description = 'Hello Apex World';
        }   
    }       
}

You should have only one trigger per object, so you can control the order of execution, when you have multiple trigger for an object, you will not know which one will execute before the other one and it cause many issues in multiple scenarios.

Copy from MaheshD answer in Salesforce Developer Forum, here are more complete best practice:
1) One Trigger Per Object
A single Apex Trigger is all you need for one particular object. If you develop multiple Triggers for a single object, you have no way of controlling the order of execution if those Triggers can run in the same contexts

2) Logic-less Triggers
If you write methods in your Triggers, those can’t be exposed for test purposes. You also can’t expose logic to be re-used anywhere else in your org. Trigger should delegate to Apex classes which contain the actual execution logic.

3) Context-Specific Handler Methods
Create context-specific handler methods in Trigger handlers

4) Bulkify your Code
Bulkifying Apex code refers to the concept of making sure the code properly handles more than one record at a time. Bulkify any "helper" classes and/or methods. Trigger should be "bulkified" and be able to process up to 200 records for each call.

5) Avoid SOQL Queries or DML statements inside FOR Loops
An individual Apex request gets a maximum of 100 SOQL queries before exceeding that governor limit. So if this trigger is invoked by a batch of more than 100 Account records, the governor limit will throw a runtime exception

6) Using Collections, Streamlining Queries, and Efficient For Loops
It is important to use Apex Collections to efficiently query data and store the data in memory. A combination of using collections and streamlining SOQL queries can substantially help writing efficient Apex code and avoid governor limits

7) Querying Large Data Sets
The total number of records that can be returned by SOQL queries in a request is 50,000. If returning a large set of queries causes you to exceed your heap limit, then a SOQL query for loop must be used instead. It can process multiple batches of records through the use of internal calls to query and queryMore

8) Use @future Appropriately
It is critical to write your Apex code to efficiently handle bulk or many records at a time. This is also true for asynchronous Apex methods (those annotated with the @future keyword). The differences between synchronous and asynchronous Apex can be found

9) Avoid Hardcoding IDs
When deploying Apex code between sandbox and production environments, or installing Force.com AppExchange packages, it is essential to avoid hardcoding IDs in the Apex code. By doing so, if the record IDs change between environments, the logic can dynamically identify the proper data to operate against and not fail.

Few more Best Practices for Triggers
- Use Collections in SOQL "WHERE" clauses to retrieve all records back in single query
- Use a consistent naming convention including the object name (e.g., AccountTrigger)


Side note: if you know that apex class called from visualforce page need to add into user profile, otherwise your user will get error, while for apex class called from trigger, we do not need to add the class to user Profile or Permission Set, this is make sense because Trigger is auto trigger without user awareness.


I had an interview with a candidate apply for a Salesforce related role in my ex-company, as the candidate shared about his/her project related to Trigger, I asked what is the best practice for trigger, and the answer "Do not use Trigger", hmmm... is that a good answer???


Reference:


Friday, December 9, 2016

Salesforce: Deploy Unmanaged Package with Workbench

With unmanaged package, we can create a package and upload it, then with provided URL, install the package into target org. In this blog, we would like to share about using Workbench to retrieve and deploy the package. You can deploy between not related Org., such as from Developer Edition org. to Sandbox org.

Source Org.
1. Navigate to Setup | Create | Packages
2. Click New button and enter a Package Name
3. From Components tab, click Add to add Components to deploy
4. Repeat step 3 until all components added
5. No need to Upload the package


Salesforce do not provide function to download the package file, so we'll use Workbench to help this.

Open Workbench, from migration menu, select Retrieve
- leave Unpackaged Manifest blank
- In Package Name, enter the package name
- Tick Single Package

Click Next button to continue, then click Retrieve button.

Once done successfully, you can download the zip file.


Target Org.
Open new Workbench (for safety, you can use different browser or browse in Private mode), from migration menu, select Deploy, select the zip file from Browse button, select Rollback on Error, and Single Package. In this sample, I deploy the package to a DE org., so I can just select NoTestRun in Test Level, but for Production org. deployment, you need to select RunLocalTests, click Next button to continue.


Click Deploy button in next screen to confirm deployment. 


You will see the deployment status as below.


You also can see the deployment status from Salesforce web interface, go to Setup | Deployment Status, but the component will be not available here.


Check in the target org. if all components deployed successfully.


Reference: Using Workbench and Salesforce to Create and Download Packages


Saturday, December 3, 2016

Salesforce: Deployment Test Levels

To deploy components from to Sandbox, or to Production via Change Set or other tools, Salesforce will offer option of test level to execute, even you just would like to validate the Change Set. I think most of admin will select Default when asked to select an option to Validate or Deploy, which is okay.

So, what is Default here mean?
If you deploy to production environment, all local tests are executed if your change set contains Apex classes or triggers. If your package doesn’t contain Apex components, no tests are run.
For deployment to development environments, such as sandbox, Developer Edition, or trial orgs, no tests are run by default.

What is the other options?


Run local tests
All tests in your org are run, except the ones that originate from installed managed packages. This test level is the default for production deployments that include Apex classes or triggers.

Run all tests
All tests in your org are run, including tests of managed packages.

Run specified tests
Only the tests that you specify are run. Choose the test classes that provide sufficient coverage for the classes and triggers being deployed. Provide the names of test classes in a comma-separated list.

Code coverage requirements differ from the default coverage requirements when using this level in production. The executed tests must cover the deployed class or trigger with a minimum of 75% code coverage. This coverage is computed for each class or trigger individually and is different from the overall coverage percentage.


Developer ideally do not have access to Production org. When deploy components with apex class or trigger, by default deployment from a sandbox to other sandbox will not execute any tests. Only when it reach deployment to Production, by default it will execute all local test and you can't skip it.

When you have major deployment, it is recommended to select test level Run local tests when you deploy within sandboxes, this will lets you catch and fix issues before the customization are rolled out to production on a targeted deployment date.

Below sample of change set deployment contains apex class and trigger, then we validate in another sandbox.

this screenshot taken when deploy to sandbox and select Default test option

this is the same change set, but with option Run local test


Reference:


Page-level ad