Pages

Showing posts with label Trigger. Show all posts

Sunday, January 22, 2017

Salesforce: Auto Lock Record

Use case: make opportunity become read-only when opportunity reach stage Closed Won.

Options: there are multiple solutions for this, from simple to advance with code:

1. Record Type & Page Layout
This would be one of the most famous solution without code, but this will make the system more difficult to maintain as the object will have additional record type set and additional page layouts. In short, when the opportunity reach Closed Won, with Workflow, change the record type to new record type and assign the new record type with page layout with read-only fields.

2. Record Ownership
This will work by change the record owner to a system user in highest role hierarchy. This will work well when the OWD sharing setting is Public Read-Only. But, often this solution will not work well, because the original record owner changed and it is important for reporting, although you can create custom user field to store it.

3. Validation Rule
By using function PRIORVALUE() and ISCHANGED() to detect any changes happened in Closed Won record. User will get error when save opportunity has been marked as Closed Won previously.

4. Trigger
Since Winter '16, Salesforce introduce lock() and unlock() methods in the System.Approval namespace.  Admin need to enable this feature, from Setup | CreateWorkflow & Approvals | Process Automation Settings. Then, select Enable record locking and unlocking in Apex.

Example:
 // Query the opportunities to lock  
 Opportunity[] opty = [SELECT Id from Opportunity WHERE Name LIKE 'Acme%'];  
 // Lock the opportunities  
 Approval.LockResult[] lrList = Approval.lock(opty, false);  
 // Iterate through each returned result  
 for(Approval.LockResult lr : lrList) {  
   if (lr.isSuccess()) {  
     // Operation was successful, so get the ID of the record that was processed  
     System.debug('Successfully locked opportunity with ID: ' + lr.getId());  
   }  
   else {  
     // Operation failed, so get all errors          
     for(Database.Error err : lr.getErrors()) {  
       System.debug('The following error has occurred.');            
       System.debug(err.getStatusCode() + ': ' + err.getMessage());  
       System.debug('Opportunity fields that affected this error: ' + err.getFields());  
     }  
   }  
 }  

5. Process Builder and Approval Process
In previous blog, we shared about users able to edit locked record and who will see Unlock Record button. As Process Builder able to call Approval Process, we'll make use of this combination to auto submit for approval when opportunity reach Closed Won. The approval process here would be auto approve, therefore it will leave a trace in the approval process.

a). Create Approval Process

b). Create Process Builder

Drawback for option (5): opportunity approval history will show action for approval submitted and approved, this is not ideal if you use opportunity with other approval process.


Reference:


Friday, January 6, 2017

Salesforce: Workflow Action Failed to Trigger Flow

You build awesome Process Builder or Flow and it works as tested. Few days later, your user start complaining see ugly error as sample below. What is this mean? Is this mean Salesforce buggy, or you have successfully hack it?

Workflow Action Failed to Trigger Flow
The record couldn’t be saved because it failed to trigger a flow. A flow trigger failed to execute the flow with version ID 30128000000AgZ7. Contact your administrator for help.

Click here to return to the previous page. 


or something like this:

Workflow Action Failed to Trigger Flow
The record couldn’t be saved because it failed to trigger a flow. A flow trigger failed to execute the flow with version ID 30190000000XmQs. Flow error messages: <b>An unhandled fault has occurred in this flow</b><br>An unhandled fault has occurred while processing the flow. Please contact your system administrator for more information. Contact your administrator for help. 

Click here to return to the previous page.

The one below happened when PB try to call Flow and it fail, it may be caused by the Flow is Inactive, while the one earlier is related to update record fail.

Actually, what here mean is, something is broken with Process Builder or Flow built into your org., it can be fail to update record because of validation rules, error in Flow, or etc.

In our blog earlier, we mentioned that prefix 301 is InteractionDefinitionVersion, but we can't really easily see that record content by putting into URL, or by query with SOQL. So, how to trace that 301 error is referring to which Process Builder or Flow?

The user who create the Process Builder will get email from FlowApplication, with subject "Error Occurred During Flow "flow name", this email will mentioned the flow name, but no Version Id information as in the screenshot above. If the user create that Process Builder not in office, how you can trace Version Id prefix 301 is related to what?

There are 2 options to find this:

1. Flow
Use Flow Designer to check if that Id is refer to which Process Builder or Flow -- remember that Process Builder is using Flow as it engine. Follow this Url https://na3.salesforce.com/designer/designer.apexp#Id=30190000000XmQs, change na3 to your salesforce instance and you should see the Flow Name which is Lead Share for this sample.


2. Workbench
Login to workbench, navigate to menu Info | Metadata Types & Components, select Flow from drop down and click Expand All. You should find that 301 Version Id from the components and get the Flow name, which is "Lead Share"


This is the Process Builder as result of our finding:


ReferenceValidation Rule in Workflow and Process Builder


Wednesday, January 4, 2017

Salesforce: Auto Add User to Multiple Chatter Groups


Requirements:
Universal Container would like to automate new Salesforce user created auto join certain Chatter groups based on user detail. Example: Finance staff should auto added to Finance group and as the user is based in Asia Pacific, she also need to be added to APAC groups.

Solution:
Create a custom object "Chatter Group" as mapping for criteria with Group Id. Here are the fields:
  • Name : auto number
  • Group Name : text
  • Group Id : text
  • Active : checkbox
  • Profile : picklist (multi-select)
  • Team : picklist (multi-select)
  • Sub-Team: picklist (multi-select)
Team and Sub-Team is custom fields available in User object.

Example: if the user with Profile = Finance, he/she will be auto added to Finance chatter group. If the user with Team = APAC, he/she will be auto added to APAC chatter group, no matter if the user has been added to other groups earlier.


Technical:
You may build Process Builder + Flow as this blog sample, but I do feel it is too complicate go with that route because of  Mixed DML error. Using trigger and apex class would be much simpler, you download snapshot of the code from here.

In essence, you just need to insert new record to this object 'CollaborationGroupMember' and populate following 2 fields:
- CollaborationGroupId = Chatter Group Id
- MemberId = User Id


Things that you need consider to be covered in the code:
- When user created
- When user change profile or other criteria, the code should auto add user to new groups
- When deactivated user become active again
- When user deactivated -- there is no need to care for this, Salesforce will auto remove users from all groups


Thursday, December 22, 2016

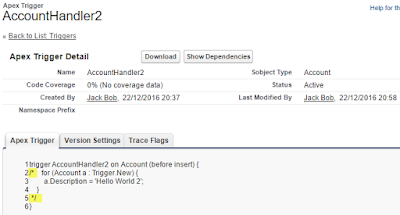
Salesforce: delete Trigger and Apex Class in Production

In previous blog deactivate Trigger in Production, we share how to deactivate trigger in Production environment, also option to comment whole trigger or apex class. Comment the whole apex class or trigger should not cause any issue, but that's not ideal, personally I prefer just to delete it.

But, as in the blog earlier, there is no Delete button in Trigger and Apex class. So how to delete it? In this blog, I'll use Workbench to help, you can do the same using Ant migration tool.

In short, you need the same procedure as with deploying components, but also to include a delete manifest file that’s named destructiveChanges.xml and list the components to delete in this manifest. The format of this manifest is the same as package.xml except that wildcards aren’t supported.

1. Prepare the files
package.xml - you can copy and file from below:
<?xml version="1.0" encoding="UTF-8"?>
<Package xmlns="http://soap.sforce.com/2006/04/metadata">
    <version>38.0</version>
</Package>

destructiveChanges.xml - make sure 'C' in capital
sample file:
<?xml version="1.0" encoding="utf-8"?>
<Package xmlns="http://soap.sforce.com/2006/04/metadata">
  <types>        
    <members>Class1</members>
    <members>Class2</members>
    <name>ApexClass</name>
  </types>
  <types>
    <members>Trigger1</members>
    <name>ApexTrigger</name>
  </types> 
<version>38.0</version>
</Package>

Put both files above in a folder, zip the files (without folder) and name it as package.zip. For the name tag in the file above, see Metadata Types.


2. Workbench
Login to Workbench, select Migration | Deploy, select the zip file and enable both 'Rollback On Error' and 'Single Package'.


Click Next button button to continue, then Deploy button to proceed.


Wait for deployment, normally will take less than 1 minute. Once finish, you will get the result -- done and check the status.


Reference:


Salesforce: deactivate Trigger in Production

In certain circumstances, we need to deactivate trigger temporary or permanently. But, if you open the trigger in Salesforce production environment, you will not see Edit and Delete button.

screenshot from production org.

screenshot from sandbox org.

So, how to deactivate trigger in production? In short, deactivate the same trigger in sandbox and deploy it to production. You can deploy with Ant, Force.com IDE, or simple Change Set.

after inactive trigger deployed to production


The other option is to keep the trigger active, but comment all the content. Although this is not ideal, but you can use the same concept to remove any logic in Apex Class.


Reference


Thursday, December 15, 2016

Salesforce: Trigger Best Practices

I have see in many org, where developer / consultant implement Salesforce with customization that not following best practice. It may work for a while, but on going support become challenge.

In previous blog, we share basic of  trigger related to syntax. In that blog, it show we directly add logic in the trigger itself, but is that a best practice? For sure it is not, why? There are many reason, from: test purpose, re-use and etc. So, here is the sample copy from previous blog:

trigger AccountHandler on Account (before insert) {
    for (Account a : Trigger.New) {
        a.Description = 'Hello World';
    }   
}

The best practice is to have less logic within trigger itself, and put the logic in the apex class, so trigger more act as traffic light to arrange to call the right class.

We can easily modify above trigger to split the logic into apex class:

Trigger
trigger AccountTrigger on Account (before update) 
{
    AccountHandler objAccount = new AccountHandler();
    objAccount.onBeforeUpdate(Trigger.newMap);
}

Apex Class
public class AccountHandler
{
    public void onBeforeUpdate(Map<Id,Account> mpAccount)
    {        
        for (Account a : mpAccount.values()) {
            a.Description = 'Hello Apex World';
        }   
    }       
}

You should have only one trigger per object, so you can control the order of execution, when you have multiple trigger for an object, you will not know which one will execute before the other one and it cause many issues in multiple scenarios.

Copy from MaheshD answer in Salesforce Developer Forum, here are more complete best practice:
1) One Trigger Per Object
A single Apex Trigger is all you need for one particular object. If you develop multiple Triggers for a single object, you have no way of controlling the order of execution if those Triggers can run in the same contexts

2) Logic-less Triggers
If you write methods in your Triggers, those can’t be exposed for test purposes. You also can’t expose logic to be re-used anywhere else in your org. Trigger should delegate to Apex classes which contain the actual execution logic.

3) Context-Specific Handler Methods
Create context-specific handler methods in Trigger handlers

4) Bulkify your Code
Bulkifying Apex code refers to the concept of making sure the code properly handles more than one record at a time. Bulkify any "helper" classes and/or methods. Trigger should be "bulkified" and be able to process up to 200 records for each call.

5) Avoid SOQL Queries or DML statements inside FOR Loops
An individual Apex request gets a maximum of 100 SOQL queries before exceeding that governor limit. So if this trigger is invoked by a batch of more than 100 Account records, the governor limit will throw a runtime exception

6) Using Collections, Streamlining Queries, and Efficient For Loops
It is important to use Apex Collections to efficiently query data and store the data in memory. A combination of using collections and streamlining SOQL queries can substantially help writing efficient Apex code and avoid governor limits

7) Querying Large Data Sets
The total number of records that can be returned by SOQL queries in a request is 50,000. If returning a large set of queries causes you to exceed your heap limit, then a SOQL query for loop must be used instead. It can process multiple batches of records through the use of internal calls to query and queryMore

8) Use @future Appropriately
It is critical to write your Apex code to efficiently handle bulk or many records at a time. This is also true for asynchronous Apex methods (those annotated with the @future keyword). The differences between synchronous and asynchronous Apex can be found

9) Avoid Hardcoding IDs
When deploying Apex code between sandbox and production environments, or installing Force.com AppExchange packages, it is essential to avoid hardcoding IDs in the Apex code. By doing so, if the record IDs change between environments, the logic can dynamically identify the proper data to operate against and not fail.

Few more Best Practices for Triggers
- Use Collections in SOQL "WHERE" clauses to retrieve all records back in single query
- Use a consistent naming convention including the object name (e.g., AccountTrigger)


Side note: if you know that apex class called from visualforce page need to add into user profile, otherwise your user will get error, while for apex class called from trigger, we do not need to add the class to user Profile or Permission Set, this is make sense because Trigger is auto trigger without user awareness.


I had an interview with a candidate apply for a Salesforce related role in my ex-company, as the candidate shared about his/her project related to Trigger, I asked what is the best practice for trigger, and the answer "Do not use Trigger", hmmm... is that a good answer???


Reference:


Thursday, October 6, 2016

Salesforce: Coding Editors

We discussed about Trigger syntax earlier. This blog, we'll continue with coding editor. To write a trigger, you need in a 'good' coding editor. Salesforce provide option of coding editors with its own benefits, from online editor within Salesforce environment until desktop application.

Please note that you can only write / edit code not directly in Production org. But you need to deploy from a sandbox or developer edition org., but we'll not discuss that in this blog.

1. Setup Menu
Setup | Customize | Object Name (such as Lead, Account, etc) | Triggers - click New button to create new trigger or Edit link to edit existing trigger.

This is the most basic editor, but also the most easiest and quickest way to code. You do not need to install anything, just login to Salesforce and make sure you have the right permissions.
When you create new trigger from here, it will provide basic trigger syntax, but no coloring, auto complete and etc. that offered by more advanced coding editor. Because as this is online coding, you need to have good internet connection.


2. Developer Console
Login to Salesforce, click your name at top right menu | Developer Console - this will open a popup window for Developer Console. Click File | New | Apex Trigger to create new trigger, or File | Open to open existing trigger.


Provide Name and select a sObject to start create new trigger.


Same as coding editor from setup menu, Developer Console is online tool so you do not need to install anything. But, compare to editor in setup menu, Developer Console have more advantages, from: color coding, auto completion, it even tell you if you have syntax error, or field not available online (see Problems tab from above screenshot).

Within Developer Console, you can run SOQL query from Query Editor, but you need to click few menu to get the object schema: File - Open - Objects - object name.


3. Force.com IDE
Follow this step to install Force.com IDE to your computer. This is the most common coding editor use by Salesforce developers. Force.com IDE is a plug-in for Eclipse to interact with Salesforce, this mean you need to setup Eclipse in your computer, then add the plug-in.

It is much more powerful then online coding editors mentioned above, on top of features offered by online editor, with Force,com IDE you can do deployment between org. (in comparison with Change Set only for org. related within a Production org.), and many more.


Although this tool is mean for developer, but admin also can take advantages of this tool to search or edit metadata, watch this on YouTube Hands-on Training: Get started with the Force.com IDE for Admins.

The only issue I always heard that this tool is pretty heavy, that's mean you need to have a powerful computer, if you are using Windows machine, you should run 64-bit OS, my experience running Force.com with 32-bit Windows machine is not really, very slow and keep hanging.

Force.com IDE offer more advanced SOQL by showing object schema.


4. MavensMate
Same as Force.com IDE, you need to install MavensMate on your computer, it is also a plug-in that you need to add on top other editor, but instead of Eclipse, with MavensMate you can choose to use Sublime Text 3, Atom, or Visual Studio Code.

Follow this link to install MavensMate. This tool is not really by Salesforce, but it is open source project. MavensMate getting more popularity recently, according to David Liu said this is the best coding editor to code Salesforce.

This tool offer about the same functionality with Force.com IDE, but in different layout and setting. 


Some user do not like Force.com IDE, because of (some items refer from An Easier Way to Delete Apex Classes From Production):
  • The Force.com IDE is very ‘heavyweight’ and is known for being quite buggy sometimes and unpleasant to use
  • They have a number of dependencies (a compatible version of Java, different IDE version etc)
  • Connectivity to Salesforce via the Force.com IDE may be an issue
  • It's very slow when you are using Windows 32-bit machine.

5. Others IDE
I'll not go to the detail for each others IDE, but here is the list:
For complete other IDE, refer to this blog by Jitendra Zaa.


Tuesday, September 6, 2016

Salesforce: Getting Started with Trigger syntax


trigger TriggerName on ObjectName (trigger_events) {
   // code_block
}

TriggerName: name for the trigger e.g. AccountHandler
ObjectName: object start the trigger e.g. Account
trigger_eventscan be a comma-separated list of one or more of the following events:
before insert
- before update
- before delete
- after insert
- after update
- after delete
- after undelete

For example, the following code defines a trigger for the before insert and before update events on the Account object:
trigger AccountHandler on Account (before insert, before update) {
    // Your code here
}

Context Variables
To access the records that caused the trigger to fire, use context variables.
Trigger.New contains all the records that were inserted in insert or update triggers.
Trigger.Old provides the old version of values before they were updated in update triggers, or a list of deleted values in delete triggers.

You can use for loop to iterate over Trigger.New to get each individual sObject because data enter to Salesforce maybe in bulk, example: Data Loader or from integration with other system. Sample trigger below will populate / overwrite Description field when new accounts created.

trigger AccountHandler on Account (before insert) {
    for (Account a : Trigger.New) {
        a.Description = 'Hello World';
    }   
}
a = variable of object Account

Sample of after insert trigger:
trigger AccountHandler on Account (after insert) {
    for (Account acc : Trigger.New) {
        Task t = new Task();
        t.Subject = 'Hello World';
        t.Priority = 'High';
        t.WhatId = acc.Id;
        insert t;   
    }   
}
compare this trigger with before insert in trigger earlier, this trigger will create a Task and relate it to Account created, therefore we need Account Id.

NOTES: in triggers above, we directly put the logic into trigger, it will work, but that is not the best practice. Ideally trigger should just act as traffic controller to direct to particular apex class based on the event and context.

Here another sample of trigger using if and else syntax, and trigger context variables.
trigger AccountHandler on Account (before insert, after insert, after delete) {
    if (Trigger.isInsert) {
        if (Trigger.isBefore) {
            // Process before insert
        } else if (Trigger.isAfter) {
            // Process after insert
        }        
    }
    else if (Trigger.isDelete) {
        // Process after delete
    }
}

List of context variables available for triggers:
  • isExecuting: returns true if the current context for the Apex code is a trigger, not a Visualforce page, a Web service, or an executeanonymous() API call.
  • isInsert: returns true if this trigger was fired due to an insert operation, from the Salesforce user interface, Apex, or the API.
  • isUpdate: returns true if this trigger was fired due to an update operation, from the Salesforce user interface, Apex, or the API.
  • isDelete: returns true if this trigger was fired due to a delete operation, from the Salesforce user interface, Apex, or the API.
  • isBefore: returns true if this trigger was fired before any record was saved.
  • isAfter: returns true if this trigger was fired after all records were saved.
  • isUndelete: returns true if this trigger was fired after a record is recovered from the Recycle Bin (that is, after an undelete operation from the Salesforce user interface, Apex, or the API.)
  • new: returns a list of the new versions of the sObject records. Note that this sObject list is only available in insert and update triggers, and the records can only be modified in before triggers.
  • old: returns a list of the old versions of the sObject records. Note that this sObject list is only available in update and delete triggers.

Reference


Thursday, August 21, 2014

How to use Salesforce sharing rules with Profiles?

Scenario: we have a group of people need to edit all opportunity, this user is defined by Profile. When we enable Modify All permission in the profile, it will enable Delete permission as well, which is not allowed. User in the profiles scattered around many Roles.

Thinking about to use sharing rules, but as of know Summer '14 release, sharing rules is based on Public Group and Role only. To create a new Public Group and add user to the group manually is not nice solution as admins tend to forget to add / remove user from the group.


To move all users from those Profiles to top role hierarchy is not good option, as it will open access to all other objects.

Found an idea in IdeaExchange - Sharing Settings allow Share With User or Profile

Since all point and click option is not a good option. We found it is easier to use a simple trigger to block user to delete the record.
  • Left Modify All permission enable for the Profile (which also mean Delete permission enabled)
  • Add a trigger to check what is the User Profile
  • If the Profile(s) allowed to delete might change, you can use a Custom Setting to specify the Profiles allowed, and have the trigger read the Custom Setting instead of hard coding.
Here is a snippet of the trigger for Opportunity, where you can enhance with multiple Profiles and Custom Setting

trigger StopDeleteOpportunity on Opportunity (before delete) {
    for (Opportunity opty : System.Trigger.Old) {
        String profileId = userinfo.getProfileId();
        System.Debug('userinfo.getProfileId - ' + profileId);
        String profileName=[Select Id,Name from Profile where Id=:profileId].Name;    
        System.Debug('Profile Name - ' + profileName);

        if (profileName != 'Sales Ops')
        {
            opty.addError('You are not allowed to delete Opportunity',False);
        }
    }
}


Reference:

Friday, February 7, 2014

Salesforce: Simple Test Method

This blog is continuation from previous blog about simple trigger. As I mentioned earlier, you need to write Test Method to deploy apex code (including trigger) from sandbox or developer instance to production instance. Remember all activities below only in Developer or Sandbox instance.

Let us create a simple test method related to trigger to act as workflow with field update blog written earlier. Without further ado:


You can right click the image above and select 'Open image in new tab' if you are using Google Chrome to get better image resolution or get the text version from this URL.

Let me give a quick explanation on the code above:
  • We start with creation of record in reference object Iso_Country_Mapping__c and populate Country Code and Country Name
  • Continue with Account creation, then update Billing Country of Account
  • The first 2 test methods are Positive test case
  • The last one for Negative test case, USA is not valid country, only US or United States

Once the code save successfully (Salesforce will check the code for any syntax error, it will not allow you to save if any error), you can click button 'Run Test' to execute the test method and see the result.


Now, go back to your the trigger and look for Code Coverage, if nothing wrong it should be updated, remember we need at least 75%, if you can achieve 100% is perfect. Code above cover for 91% as screenshot below  


The test method show here is very simple using single record of positive and negative test case, but in many scenarios, you can enhance with multiple records test case and testing as other users. 

Reference: Testing Example


Tuesday, February 4, 2014

Salesforce: Simple Trigger to Act as Workflow with Field Update

In previous blog, I discuss about how to write a simple trigger to act as validation rule. In this blog, I'll continue to use trigger to act as workflow with field update.

Scenario: it is good that we manage user only able to enter Singapore or SG, so no more SGP or Spore for the Billing Country. But, even we have only Singapore and SG, it would be best we only have SG, this will make the report even easier and better.

We can enhance existing trigger and add few lines. I'll not write about custom object and how to start write trigger. Here you go:


You can right click the image above and select 'Open image in new tab' if you are using Google Chrome to get better image resolution or get the text version from this URL.

Let me give a quick explanation line added in the code:
  • Line 3, add new list for Account object, will use it to update Account.
  • Line 20 & 21 and 39 & 40, assign Country Code from reference table into Billing Country. You may ask why we need line 39 & 40 since user already enter 2 characters only, and it match to the Country Code. Because without that 2 lines, trigger will not update Account with Country Code from reference table, so when user enter sg or Sg, system will accept it, this is not so tidy as we want all be SG, get it? 
  • Line 54 - 56 to update Account before insert or before update.


Sunday, February 2, 2014

Salesforce: Simple Trigger to Act as Validation Rule

After active for more than 18 months in Salesforce Answer Success Community and answered for more than 5000 posts (currently stay at 5,271), I see many members asking for help or advise to fix validation rules, to make sure the validation rule will block invalid data based on some criteria.

Use Case: user only allowed to enter Billing Country in Account with US only or "US or Unites States" only, but not USA or U.S.A or U.S. or etc. I concur this is a good practice to standardize data entry, so user or admin can easily run a report and group them altogether with correct result.

But, what happen if you want to validate 200 countries name in the world? Using validation rule, it will be difficult to maintain. Furthermore, if the values need to be maintained by users, not by system admin, using validation rule is not possible.

Let me introduce a simple trigger to act as validation rule. The idea is using a custom object as reference table. I'll not discuss how to create custom object and assume you are familiar with it. See this screenshot:


User can maintain the values from page layout:

Extra Tips: You can have above View with object page layout without have to create new Tab (remember you have maximum Tab limitation, except for Unlimited or Performance edition). Just enter 3 letters key prefix of the object into URL, example: https://na3.salesforce.com/a0m
Change na3 with your Salesforce instance; a0m is the key prefix for this custom object.
You can use Developer Workbench to easily get the object prefix

Back to the trigger and follow steps below to create trigger:
- Go to Setup | Customize | Accounts | Triggers
- Click New button
- Copy and paste code below into editor
- Click Save button


You can right click the image above and select 'Open image in new tab' if you are using Google Chrome to get better image resolution or get the text version from this URL.

Let me give a quick explanation for code above:
  • First, check if Billing Country is not blank, if blank than go through.
  • Second, check if Billing Country is only 2 characters, if YES check Country Code, if No check Country Name.
  • If not found, use addError() method to stop system to save and show error message.

Please note that you need to have Test Method apex class with at least 75% coverage of above trigger to enable it deploy to Salesforce Production instance.

From above quick explanation, it check both Country Code and Country Code based on length of Billing Country, using the same way, you can expand the code to check more things with more advance logic.

More samples here:
trigger DuplicateAccountNameCountryCheck1 on Account (before insert, before update)
{
    For(Account a:Trigger.New)
    {
        List<Account> acc=[SELECT Id, Name FROM Account WHERE Name=:a.Name AND BillingCountry=:a.BillingCountry];
        if(acc.size()>0)
        {
            a.addError('You are not allow to create duplicate Account Name with the same Country');
        } 
    }
}


trigger DuplicateAccountNameCountryCheck2 on Account (before insert, before update)
{
    For(Account a:Trigger.New)
    {
        Integer acc=[SELECT count() FROM Account WHERE Name=:a.Name AND BillingCountry=:a.BillingCountry];
        if( acc>0 )
        {
            a.addError('You are not allow to create duplicate Account Name with the same Country');
        } 
    }
}


Page-level ad